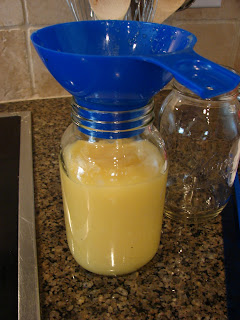
Last Saturday I canned 23 quarts of applesauce with the help of my family. It was a big effort, but in the end it was totally worth it because homemade applesauce is just so darn good. I used a bushel of Jonagold apples and a bushel of Jonathan apples and loved the taste of both apples for applesauce. I made half regular and half with cinnamon - we love both. I used the recipe from my trusty Ball Blue Book canning cookbook. I don't have a food mill (maybe I'll get one for a future birthday present :)), so I used an apple/peeler/corer/slicer to prepare the apples. We had a quart of the Jonagold regular applesauce with dinner last night and my kids called it liquid gold so I think all the effort was worth it!
Homemade Canned Applesauce
2 1/2 - 3 1/2 pounds of apples per quart of applesauce desired
water
Fruit Fresh
sugar (optional)
cinnamon (optional)
canning supplies (canner, quart jars, new lids, rings, etc.)
1. Peel, core, and slice the apples. Place in a large stock pot with about an inch of water in the bottom of the pot (this is so the apples won't stick and burn on the bottom of the pot). Every so often I sprinkle Fruit Fresh on the apple slices and stir them around to keep the apples from browning. Fill up the pot with apples as they will cook down a lot.
2. Cook apples until soft being sure to stir the bottom vigorously and adding water as needed so apples don't stick to the bottom. At this point I like to transfer the cooked apples to a different stock pot (this is just to assure that any apples that have stuck to the bottom with not be in the finished applesauce).
3. Off the heat use an immersion blender to blend the applesauce to the desired consistency - we like it just slightly chunky. If you do not have an immersion blender you can use a food processor or blender.
4. Add desired amount of sugar to taste or none at all if the apples are sweet enough - I added 2 cups of sugar to each pot of applesauce.
5. Add cinnamon, if making cinnamon applesauce, to taste. I added about 3 teaspoons of cinnamon to each pot of applesauce.
6. Place applesauce back on the heat and bring to a boil, stirring constantly. Then turn down the heat to a simmer and cook stirring for 5 minutes.
7. Remove from heat and ladle hot applesauce into sterilized quart size jars, leaving 1/2 inch of head space. Place a sterilized new lid on each jar. (To sterilize lids place them in a small saucepan of just simmering water - you do not want to boil the lids.) Screw on a ring tightly. Place jars into the canner rack.
8. Place rack with jars into canner with boiling water. Water should completely cover the jars. Bring back to full boil, then cover and process at a full boil for 20 minutes plus any additional time needed for your altitude - I add 10 minutes for my altitude, refer to the chart below.
**As a side note: I can on a camp stove in my garage with the garage door open. This helps keep the mess of the canning process out of my kitchen and not on my stove. It's really a great way to can if you have a camp stove.
9. After required processing time remove the rack and jars from the canner and place jars on a towel lined surface (use a jar lifter - they are hot!). Do not move the jars for 24 hours. During this time all the jars should seal.
10. At the end of 24 hours inspect each jar to make sure it has sealed by pressing the middle of the lids to make sure they don't spring back when pressed. Wipe the jars clean with a wet wash cloth. Label the tops of the lids with the year, a chalk marker works great for writing on the lids. Store sealed jars at room temperature - they will last the longest if they are stored in a cool, dry, dark place.


No comments:
Post a Comment